Wednesday, October 24, 2007

Configuring Windows Server 2008 Server Core Basic Networking Settings

Configuring Windows Server 2008 Server Core Basic Networking Settings

In my previous article I have written about how, in Windows Server 2008, Server Core installation does not include the traditional full graphical user interface (GUI). Therefore, once you have configured the server, you can only manage it locally at a command prompt, or remotely using a Terminal Server connection. Read more about Server Core on my "Windows Server 2008 Server Core" article.

Like any other server, Server Core machines must be properly configured to be able to communicate on your network. Some of these settings include:

  • Configuring an IP address
  • Configuring an administrator's password
  • Configuring a server name
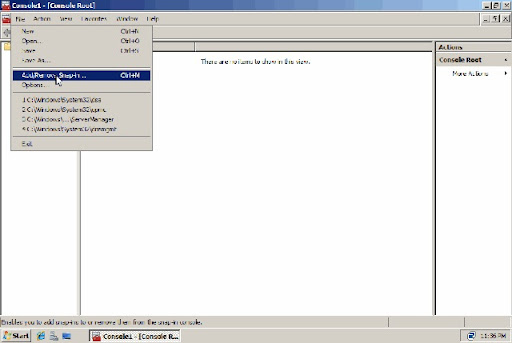
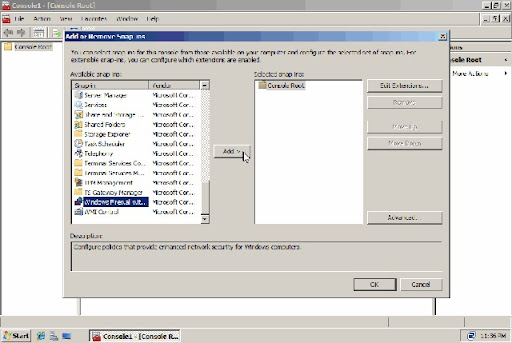
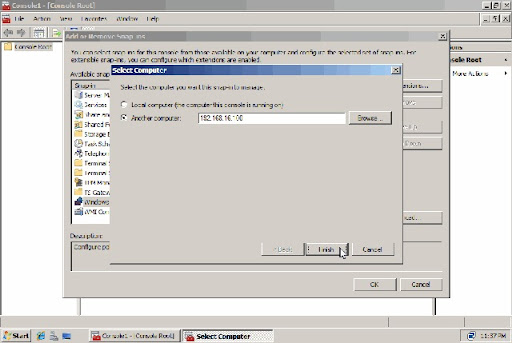
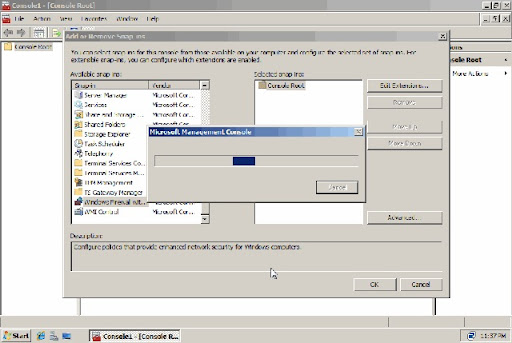
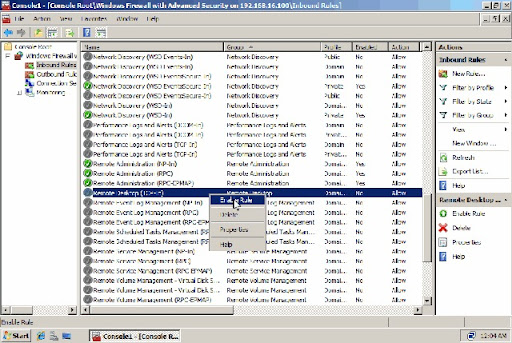
  • Enabling remote MMC snap-in management
  • Enabling remote RDP connections
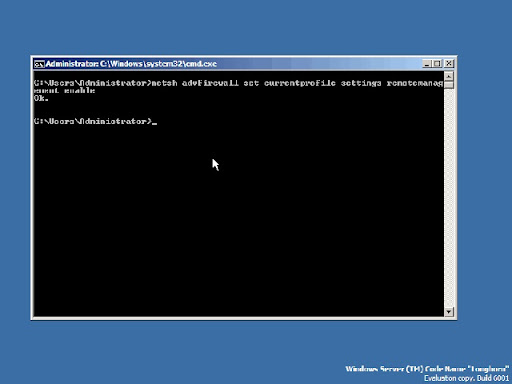
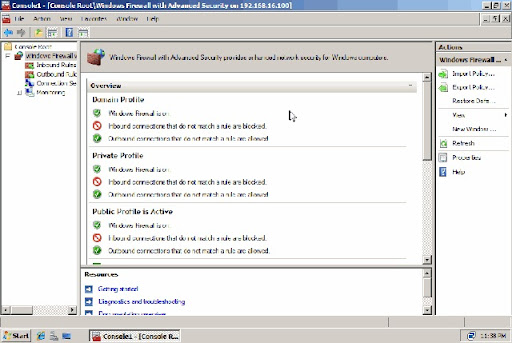
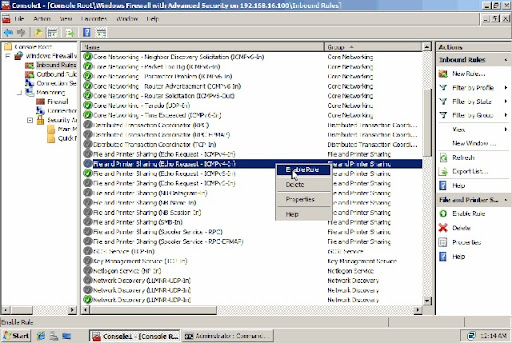
  • Enabling remote Windows Firewall management
  • Enabling remote shell management
  • Activating the server
  • Joining a domain
  • Configuring Windows Updates
  • Configuring error reporting
  • Adding server roles and features

And other tasks.

Before you start, you need to configure the server's IP address.

To set the server with a static IP address

    1. At a command prompt, type the following:

      netsh interface ipv4 show interfaces


    2. Look at the number shown in the Idx column of the output for your network adapter. If your computer has more than one network adapter, make a note of the number corresponding to the network adapter for which you wish to set a static IP address.
    3. At the command prompt, type:

      netsh interface ipv4 set address name="<ID>" source=static address=<StaticIP> mask=<SubnetMask> gateway=<DefaultGateway>


      Where:
      • ID is the number from step 2 above
      • StaticIP is the static IP address that you are setting
      • SubnetMask is the subnet mask for the IP address
      • DefaultGateway is the default gateway

    4. At the command prompt, type:
      netsh interface ipv4 add dnsserver name="<ID>" address=<DNSIP> index=1

      Where:
      • ID is the number from step 2 above
      • DNSIP is the IP address of your DNS server


    5. Repeat step 4 for each DNS server that you want to set, incrementing the index= number each time.

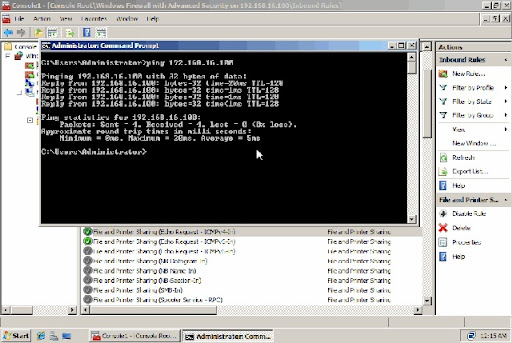
    6. Verify by typing ipconfig /all and checking that all the addresses are correct.

To set the administrative password in Windows Server 2008

  1. At a command prompt, type the following:

    net user administrator *

  2. When prompted to enter the password, type the new password for the administrator user account and press ENTER.
  3. When prompted, retype the password and press ENTER.

Next, you might want to change the computer's name, as the default name is a random-generated name (unless configured through an answer file)

To change the name of the server

  1. Determine the current name of the server with the hostname or ipconfig /all commands.
  2. At a command prompt, type:

    netdom renamecomputer <ComputerName> /NewName:<NewComputerName>

  3. Restart the computer by typing the following at a command prompt:

    shutdown /r /t 0

To manage a server running a Server Core installation by using the Windows Remote Shell

  1. To enable Windows Remote Shell on a server running a Server Core installation, type the following command at a command prompt:

    WinRM quickconfig

  2. Click Y to accept the default settings.

    Note: The WinRM quickconfig setting enables a server running a Server Core installation to accept Windows Remote Shell connections.
  3. On the remote computer, at a command prompt, use WinRS.exe to run commands on a server running a Server Core installation. For example, to perform a directory listing of the Windows folder, type:

    winrs -r:<ServerName> cmd

    Where ServerName is the name of the server running a Server Core installation.
  4. You can now type any command that you require, it will be executed on the remote computer.

To activate the server

  1. At a command prompt, type:
    slmgr.vbs –ato

  2. If activation is successful, no message will return in the command prompt.

To activate the server remotely

  1. At a command prompt, type:
    cscript slmgr.vbs -ato <servername> <username> <password>

  2. Retrieve the GUID of the computer by typing:
    cscript slmgr.vbs -did

  3. Type
    cscript slmgr.vbs -dli <GUID>

  4. Verify that License status is set to Licensed (activated).

To join a Windows 2008 server to a domain

  1. At a command prompt, type:
    netdom join <ComputerName> /domain:<DomainName> /userd:<UserName> /passwordd:*

    Where:
    • ComputerName is the name of the server that is running the Server Core installation.
    • DomainName is the name of the domain to join.
    • UserName is a domain user account with permission to join the domain.


    Note: Entering * as the password means you will be prompted to enter it on the command prompt window in the next step. You can enter it in the initial command, if you wish to.

    Note: Note that the word "passwordd" has 2 d's in it…
  2. When prompted to enter the password, type the password for the domain user account specified by UserName.
  3. Restart the computer by typing the following at a command prompt:

    shutdown /r /t 0

To remove the Windows 2008 server from a domain

  1. At a command prompt, type:

    netdom remove

  2. Reboot the computer.

To configure automatic updates

  1. To enable automatic updates, type:

    cscript C:\Windows\System32\ Scregedit.wsf /au /4

  2. To disable automatic updates, type:

    cscript C:\Windows\System32\ Scregedit.wsf /au /1

  3. BTW, in order to view your current settings you can type:

    cscript C:\Windows\System32\ Scregedit.wsf /au /v

To configure error reporting

  1. To verify the current setting, type:

    serverWerOptin /query

  2. To automatically send detailed reports, type:

    serverWerOptin /detailed

  3. To automatically send summary reports, type:

    serverWerOptin /summary

  4. To disable error reporting, type:

    serverWerOptin /disable

Summary

Windows Server 2008 Core machines need to be properly configured for communication across your network. While most of the Server Core settings need to be configured via the local Command Prompt, some settings can also be configured remotely. This article, a part of a complete Server Core article series, will show you how to do that.

Saturday, October 20, 2007

Remotely Managing Windows 2008 Server Core Firewall

Remotely Managing Windows 2008 Server Core Firewall

As you already know by now, in Windows Server 2008, Server Core installation does not include the traditional full graphical user interface (GUI). Therefore, once you have configured the server, you can only manage it locally at a command prompt, or remotely using a Terminal Server connection. A third management option is to manage the server remotely using the Microsoft Management Console (MMC) or command-line tools that support remote use.

Read more about Server Core on my "Windows Server 2008 Server Core" article.

One of the major pains of managing such a GUI-stripped installation is the configuration of the Windows Advanced Firewall settings. Without properly configuring these rules, you will find it extremely difficult to remotely manage your server.

In this article, I assume that you have already configured your server core with the bare minimum requirements to operate in a network. These requirements are:

  • Configuring an IP address
  • Configuring a server name
  • Configuring an administrator's password

You should, but are not required to, also join the server to your domain.


Next, in order to properly configure Server Core to allow you to control its Firewall settings remotely, via GUI, follow these steps:

Step #1: Enable remote management through the firewall

On your Server Core machine, at a command prompt, type the following:

netsh advfirewall set currentprofile settings
remotemanagement enable


fw_rmt_mgmt_0

This will allow you to control the Firewall's settings from a remote MMC snap-in.

You can always run the following command in order to disable this option:

netsh advfirewall set currentprofile settings
remotemanagement disable


Step #2: Open the Windows Firewall snap-in

  1. On a remote computer running Windows Server 2008 or Windows Vista, click Start > Run, then type MMC and press ENTER.
  2. Click File > Add/Remove Snap-in.
    fw_rmt_mgmt_1
  3. In the Add or remove snap-ins, scroll down till you find the Windows Firewall with advanced security snap-in.
    fw_rmt_mgmt_2
  4. Click Add, then in Another Computer, type the name or IP Address of the Server Core server you want to manage.
    fw_rmt_mgmt_3
  5. After a short loading, if all is ok, you will be presented with the management GUI of the remote server.
     fw_rmt_mgmt_4 fw_rmt_mgmt_5
  6. You can now create new Firewall rules, enable or disable existing rules, export your settings or disable the Firewall altogether.
    For example, to enable the rule allowing Remote Desktop connections to the Server Core, go to Inbound Rules. In the results pane scroll down till you find Remote Desktop (Tcp-in), right-click it and choose Enable.

fw_rmt_mgmt_6

Another example would be to enable ICMP Echo Replies (or simply put – Ping replies) from the Server Core server, allowing the administrators to test for connectivity issues with the server. To enable the rule allowing ICMP Echo Replies from the Server Core, go to Inbound Rules. In the results pane scroll down till you find File and Printer Sharing (Echo Request – ICMPv4-In), right-click it and choose Enable.

fw_rmt_mgmt_7

Pings to the Server Core server should now work.

fw_rmt_mgmt_8

You can save the current MMC window for future use. As long as you do not change the settings on step #1, or change the server's IP Address (if you've used an IP Address to connect to it in the first place), it should continue working for as long as you want.

Summary

Running Server Core requires manual control of many settings, and without proper Firewall configuration you may find it hard to remotely connect to it. This article showed you how to configure the Server Core server in order to remotely connect and configure the Windows firewall component.


Technorati Tags: , , ,

Monday, October 15, 2007

Subnetting Table

Subnetting Table

Use this table to help you calculate Subnet Masks, available hosts per subnet or number of subnets per class. The table deals with Subnetting of only one octet.

net1

M=Number of Masked bits

N=Number of Non-masked bits - Remember that in Class A and B networks you have other octets besides the one you're subnetting. Therefore in a Class A network instead of saying 7 (for example) you must say 7+8+8. In a Class B network instead of saying 5 (for example again, duh!) you must say 5+8. Only in Class C networks does the N value remain the same.

 net2

How many potential IP addresses do we have?

126 networks of 16,777,214 hosts each = 2,113,928,964

16,384 networks of 65,534 hosts each = 1,073,709,056

2,097,152 networks of 254 hosts each = 532,676,608

Total number of hosts = 3,720,314,628

Note: In Windows NT 4.0 you had to subtract 2 from the total number of available subnets. For example, if you wanted 2 subnets, you had to figure the number you wanted plus 2 - calculate like you wanted 4, i.e. the result would have been 192. If you wanted 8 subnets, you had to calculate like you wanted 10, i.e. the result would have been 240 instead of 224. With Windows 2000 and beyond Subnetting you do not have to do that anymore.

BTW, if you need to calculate Subnet Masks and Network IDs and you can't do it yourself (Duh, "Paper MCSE" or not?) you should try this fantastic Subnet Calculator right here:

IP Workshop

It not only calculates the required fields but also pops out a window that draws the bit pattern and explains the results. Great resource!

Wednesday, October 10, 2007

Create a Super Hidden Folder

Create a Super Hidden Folder


ImageYou probably already know how to create just a plain hidden folder. It is super easy, you just right click on the folder and select Hidden then click Apply. The problem is that anyone with access to the computer can easily turn on the Show Hidden Files and Folders and then can easily see the folder you created. Well here is a trick that will get around this problem and create a invisible folder that has no text and no icon. td

Please note: Once you create a Super Hidden folder that it will be up to you to remember where you put it. I suggest writing down the location in case you should ever forget about where this folder is.

Right Click on the folder you want hidden, then select Properties

“Right-Click_and_select_properties”

Click on the Customize Tab (Note this procedure also works on any icon, some icons do not let you Customize. So, if you do not see a Customize tab, then you will have to create a new folder and move the icon that you are trying to make hidden into the newly created folder. Then you will make the folder Super Hidden)

“Click_On_the_customize_tab”

Click On the Change Icon button

“Click_on_the_change_icon_button”

The Change Icon box will pop up with the default Windows Icons (If it does not, then click on the Browse button and navigate to your WINDOWS\system32 folder and then find and choose SHELL32.dll then click OPEN

”The_Change_Icon_Box”

Then Scroll to the right and look for a blank icon. Select the blank icon then click Ok.

”The_Change_Icon_Box”

Then Click Apply. And you should now have a blank icon with only the text below it, like this:

”Blank_Icon”

Now to get rid of the text, follow this procedure:-

You may be thinking that it is very easy to remove the titles. Probably your first thought would be to rename the icon and make a blank name. Well, that doesn’t work, if you don’t believe me try it out for yourself and see….

What happens when you try to rename the icon to a blank name? It simply reverts back to the previous name.

“Right “Hit

“It “Hit

For this trick to work, we need to make sure that File and Folder Settings has the Show File Extensions for known File Types Enabled. This is the default setting in XP, so if you have not made any changes it should be set properly. If you are not sure, then check. Here is how …

Click Start, then My Computer. Click on Tools then Folder Options.

“investigate_00a.jpg

On the View tab check mark Hide Extensions For Known File Types then Click Apply

“Put

Ok, now that we have that set...Here is the trick to removing the icon title and having a Blank Text untitled icon

First, right click on the icon that you want to remove it’s title, then go to Rename

“Right

Now, what you need to do, is hold the ALT button down. With the ALT button held down, and using the keypad type 255 then release the ALT button and hit enter, and voila you now have a untitled icon.

“Hold

This trick will work only for icon, if you are creating multiple Blank Text icons then you will need to name them like this:

  • For 1 Blank Text Icon: ALT + 255 (release ALT)
  • For 2 Blank Text Icons: ALT + 255 (release ALT) ALT + 255 (release ALT)
  • For 3 Blank Text Icons: ALT + 255 (release ALT) ALT + 255 (release ALT) ALT + 255 (release ALT)
  • And so on…

The reason we need to do this is because part of Windows XP rules state that you cannot have a file/folder/shortcut with the same name in the same folder. To get around this restriction, we simply name the first icon with 1 blank space, the second icon with 2 blank spaces, the third with 3 blank spaces and so on.

Here is the result
BEFORE:
“Before”
AFTER:
“Here

Please Note that to get this trick to work, when you are typing the 255, that you are using the 10-key keypad located on the right hand side of your keyboard. The ALT that you use does not matter

The result is a SUPER hidden Folder:

”Blank_Icon”

In the screenshot, I have the view settings on Thumbnails, which puts the grey box around the folder. To remove that box, choose either the Icon, Tiles or List from the View settings

”Choose_Icons_Tiles_or_List”


Technorati Tags:
IceRocket Tags:

Monday, October 8, 2007

12 Hidden Windows Vista Network Tools

12 Hidden Windows Vista Network Tools

Windows Vista delivers an impressive line up of network tools that can be used to keep the operating system connectivity on a short leash. The total of 12 command-line tools can be used to manage all aspects of Vista networking. Users will be able not only to closely monitor the networking activity of the platform, but also repair network connections. The utilities are not new to Windows Vista, having survived in the operating system from previous Windows versions. Here is the complete list in alphabetical order:

  • getmac – this tool will enable you to display the MAC addresses for network adaptors on a system. The Media Access Control (MAC) address for the network card can be accessed both on the local computer and on a network.
  • hostname – not sure about what the name of your machine is on the network? Just type hostname and hit enter.

  • ipconfig – according to Microsoft’s own description, the tool is designed to display by default only the IP address, subnet mask and gateway for each adapter associated with the TCP/IP. But in addition to enumerating the TCP/IP network configuration parameters users can also refresh the DHCP and DNS settings.
  • nslookup – is meant to be used according to Domain Name System.
  • net – is a general tool with commands covering a broad range of functionality.
  • netstat – displays protocol statistics and TCP/IP network connections.
  • netsh – the command-line tool enables Vista users to both view and alter the network configuration settings of computers.
  • pathping – is a middle solution which bundles the functionality delivered by traceroute and ping.
  • nbtstat – a tool that will display protocol statistics and current TCP/IP connections using NetBIOS over TCP/IP.
  • Ping – a complete description of the ping utility can be found here.
  • route – manipulates network routing tables.
  • tracert – users can implement this command-line tool to identify connectivity problems between the local computer and a network address.

When using command-line tools in Windows Vista it is healthy to remember to launch the command prompt window with administrative privileges. In order to do so, enter “cmd” in the Search box under the Vista Start Menu and press Ctrl + Shift + Enter to launch the process with elevated privileges.

Sunday, October 7, 2007

How to install Windows Vista?

How to install Windows Vista?

Step #1: Plan your installation

When you run the Windows Vista Setup program, you must provide information about how to install and configure the operating system. Thorough planning can make your installation of Windows Vista more efficient by helping you to avoid potential problems during installation. An understanding of the configuration options will also help to ensure that you have properly configured your system.

I won't go into that part right now (I might later this month, no promises...) but here are some of the most important things you should take into consideration when planning for your Windows Vista installation:

  • Check System Requirements

  • Check Hardware and Software Compatibility

  • Determine Disk Partitioning Options

  • Decide on a Workgroup or Domain Installation

  • Complete a Pre-Installation Checklist

After you made sure you can go on, start the installation process.

Step #2: Beginning the installation process

You can install Windows Vista in several methods - all are valid and good, it all depends upon your needs and your limitations. In this manual I will focus on the simplest form of installation - directly from the Windows Vista DVD media.

So, insert your Windows Vista DVD media into your DVD drive and reboot your computer. A black window will appear momentarily while the DVD content is read.

Step #3: The GUI-based portion of the Setup program

Unlike previous versions of Windows, Windows Vista does not have a noticeable text phase of the setup process, and it will boot directly into the Graphical User Interface (GUI) mode.

  1. After a few moments you will see the first prompt:

Press Next unless you want to change some regional settings for the installation process.

  1. Press the Install now button.

  1. After a short delay you're be prompted to enter your product key:

You can skip this part if you don't have the product key handy (read Install Windows Vista Without Supplying the Product Key for more info). However, if you do have a valid product key at that time (and you should have one, we're dealing with legal issues here), then by entering the right key the setup program knows which version of Vista to install.

If you skip it, you'll be prompted for a Vista version that matches your product key (the one you don't have handy at that moment):

  1. You now have to accept the license terms:

  1. Next you need to press the Custom (Advanced) installation type button:

The Upgrade button is disabled because this specific installation if performed on a new computer without any previous operating system on it.

  1. The next phase is to pick the installation partition. Since this computer has a new hard disk that hasn't been formatted before, you will only have the option to create a new partition on it. Had it had previous partitions on it you could have chosen to either delete them or perform other tasks. Pressing the Advanced button will bring up the following options.

Since we don't need to perform any additional task we will just press on the Next button. The installation process will then create a partition on all the available disk space, and format it.

  1. The setup process will now begin to copy files from the installation DVD media to the hard disk.

This will take some time:

  1. After some time (the exact amount of time will greatly depend on your computer's hardware), the setup process will install updates for the operating system.

  1. The computer will then automatically reboot.

  1. Now comes a long waiting period, where the installation process configures the system. Again, the exact amount of time will greatly depend on your computer's hardware.

  1. After the long wait, the system will then reboot once again.

  2. You will think something went wrong because of the relative long time it take the system to display anything besides the black screen, but finally, after a few moments you will note a small colored circle:

  1. A few seconds after that you will be prompted to enter a username and password for the first user on the computer.

Although the setup program will let you continue without entering a password, note that it is very advisable to enter a password here, and the best option would be to choose a complex password made of at least 7 characters or more (something like P@ssw0rd or MYpa$$w0rd). Make sure you remember it.

Also pick your user's display picture. This can be changed later.

  1. Pick a name for your computer. The setup program will create one based upon the username you chose in the previous step, but you can change it now (and later).

Also pick a background for the user's desktop. This can be changed later.

  1. Choose what sort of protection your computer gets. The recommended settings are best for someone that doesn't plan to hide their computer behind a corporate firewall (and even then, in some cases, this would be the best option). If you plan to install a 3rd-party firewall later you can opt to be prompted later.

Note that this setting will also have effect on how the computer uses the Microsoft Windows Update (Automatic Updates) features.

  1. Next comes the Time Zone settings window. Choose your location.

  1. Done! You're prompted with the last setup screen:

  1. Again a long wait and some promotional screens you see the hourglass circling around, in preparation for the first logon.

  1. Finally, the first screen appears, you're ready to rock and roll!

Note that if the computer was connected to the Internet while installing it, it will automatically download and prompt you to install any missing hotfix or update it finds for the current state of the operating system.

Done!